Settings

Tap the Settings button (“gear” icon) in the bottom toolbar to open the settings screen.
Font

- Font
Choose from a selection of built-in monospaced fonts.
- Font Size
Increase the font size by tapping the top of the font size control and tap the bottom to decrease the font size.
Themes and Keyboard Appearance

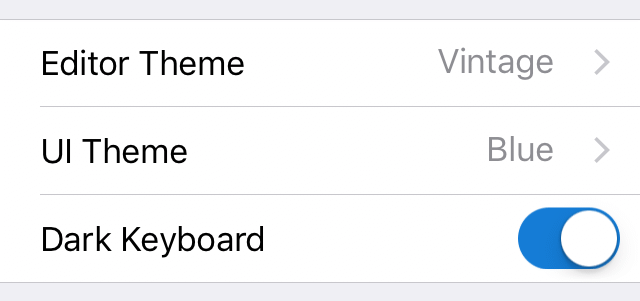
- Editor Theme
Select the theme you want to use in the code editor. The list of themes starts with light themes and ends with dark themes. You can also add custom themes.
- UI Theme
The default UI theme is Blue. You can also switch to the Gray or Black UI theme.
- Dark Keyboard
Enable this setting if you want to use a dark keyboard instead of the default light keyboard.
Line Numbers

- Line Numbers
Enable this settings to display the number of each line on the left side of each line.
- Line/Column
Show a line/column indicator on the right side above the code editor (iPad only).
Tab Characters

- Tab Width
Select the number of spaces one tab corresponds to.
- Soft Tabs
Enable to insert spaces instead of a tab character when you press the Tab key.
- Display Tab Characters
Enable to show tab characters as small gray triangles in the editor.
Word Wrap

- Indent Wrapped Lines
Enable to indent soft wrapped lines. This makes it much easier to read code, but you may want to disable it for regular text/prose.
- Auto Word Wrap
Enable to visually wrap lines (soft wrap) to the editor width.
- Wrap Column
If Auto Word Wrap is disabled, you can manually enter a column at which lines are soft wrapped.
Keyboard

- Read-Only
Enable this settings to make the editor read-only. Tapping on the editor won’t bring up the keyboard anymore.
- Auto-Correction
Enable to spellcheck words as you type, automatically correcting misspelled words. You should disable this if editing code.
- Auto-Capitalization
Enable automatic capitalization of the first letter of each sentence.
- Smart Punctuation
Enable to allow smart quotes and automatic conversion between hyphens and en or em dashes.
- Code Completion
Enable code completion. Currently, Textastic supports code completion for HTML, JavaScript, CSS, C, Objective-C, and PHP.
- Additional Keys
Enable the additional row of keys above the standard keyboard (iPad only).
- Shortcuts
Enable the standard shortcuts bar above the keyboard which has buttons for undo/redo and copy/cut/paste (iPad only). If you enable Additional Keys, this should be disabled to save screen space.
Emmet

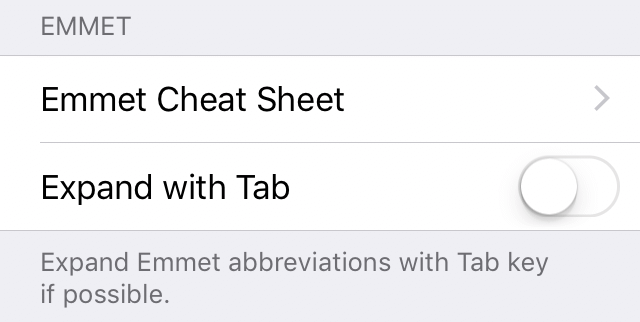
- Emmet Cheat Sheet
Open the Emmet Cheat Sheet in the browser. Also have a look at the Emmet Documentation.
- Expand with Tab
Enable to expand Emmet abbreviations with the Tab key if possible (this works for example in HTML, CSS, XML, Less, Sass, and SCSS files).
You can also use Ctrl-E on an external keyboard to expand Emmet abbreviations. See External Keyboard Shortcuts.
Password Lock

- Password Lock
You can set a password that you need to enter when launching the app. You can also enable Touch ID or Face ID (depending on your iOS device).
Set the Require Password setting to immediately after closing the app, to after 1, 5, or 15 minutes, or to after 1 or 4 hours.
Important
Make sure to remember the password you set since there is no way to recover it.
Warning
The password lock only prevents access to Textastic itself. It can be used to protect the remote connections and SSH terminal connections you set up in the app.
Even with the password lock enabled, files stored in “Local Files” are still available in the Files app in “On my iPad/iPhone” and can be accessed by the user once the device is unlocked.
Always make sure that your device is protected with a strong passcode and only give your device to people you trust in order to protect your important files.
TextExpander

- TextExpander
Enable TextExpander snippet expansion with this setting.
- Update Snippets
Tap here to launch the TextExpander app and fetch a copy of the latest snippets.
Getting Started

- Getting Started
By default, Textastic creates the
GettingStarted.textasticfile at launch. If you delete that file or if you manually disable this setting, the file won’t be created anymore.
Quick Transfer

- Upload
Enable this setting if you want to see a confirmation dialog when a quick upload would override a file on the remote server. Enabled by default.
- Download
Enable this setting if you want to see a confirmation dialog when a quick download would override a local file. Enabled by default.
